

Simple Overnight Cinnamon Rolls are a classic breakfast treat that are loved by people of all ages. They’re soft, fluffy, and filled with a sweet and gooey cinnamon filling. And the best part is, they’re relatively easy to make using a bread machine!
If you’ve never made them before, this is certainly a great way to start. These will scratch the itch for that craving you get for the rolls at the mall and MILES better than any prepackaged variety you find at the grocery store.
Cinnamon Rolls are high on the list of ultimate comfort foods for me, and if you’re short on time in the mornings, overnight cinnamon rolls are the perfect solution. You can make the dough the night before and let it rise overnight in the refrigerator. Then, in the morning, all you have to do is shape the rolls, bake them, and frost them.

These start with making the dough the night before. I get the machine started about an hour before dinner so I can get it in the fridge before the end of the night. The dough cycle runs for approximately 1 hour and 30 minutes.
Take the dough out of the machine, knock the air out by kneading a few times, and place in large, greased bowl. Lightly grease the surface of the dough so it does not dry out. Cover the bowl tightly with plastic wrap and place in the refrigerator. It will slowly rise throughout the night, and the cold fermentation enhances the flavor.
As it ferments overnight it will become a little more dense and MUCH easier to roll out in the morning. You will need approximately 1 hour and 20 minutes before you can serve the rolls. About 10 minutes for assembly, 45 minutes for rising, and 30-35 minutes for baking (depending on how thick you roll & cut them.)


The Scoop on Cinnamon Rolls
Cinnamon rolls, those warm, gooey spirals of goodness that practically melt in your mouth. Who would’ve thought that they have a history as rich and flavorful as the treat itself.
These sweet rolls can trace their roots back to medieval Europe, when cinnamon found its way into the kitchens of bakers who began making the earliest versions of cinnamon rolls. They started off more like what we now call cinnamon knots, lacking the characteristic spiral shape we associate with the modern versions.
The concept of the cinnamon roll as we know it today, began to take shape in Sweden during the 18th century. Swedish bakers started adding cinnamon to sweet bread dough, creating a fragrant baked treat that quickly gained popularity. These rolls, known as “kanelbullar” in Sweden, are often enjoyed with coffee and became an important part of the Swedish food culture.
Fast forward to the present day, and cinnamon rolls have evolved into variations found in nearly every corner of the world, from the classic American cinnamon roll smothered in cream cheese icing to delicate, flaky cinnamon pastries in Denmark. Whether you enjoy them for breakfast, dessert, or a sweet snack, cinnamon rolls continue to capture hearts and taste buds, proving that their history is as sweet as their taste.
What You’ll Need:
White Bread Flour– I do recommend using bread flour. I think it has a slightly better texture, but it is not a must. All-purpose flour will also work great.
TIP: You can also make your own bread flour by adding vital wheat gluten to all-purpose. I add 1 teaspoon vital wheat gluten per cup of all-purpose. Measure the VWG into the cup and then add the flour on top to keep an accurate measurement of dry ingredients.
Whole Milk and Half & Half– I love to use whole milk for the liquid in the dough. I use half and half in the icing. The icing can also be doubled if you like. Just make sure you have plenty of the ingredients just incase.
Instant Yeast– Instant or Bread Machine Yeast is perfect for this recipe. I buy mine in the larger jar or a 1 pound package. Be sure to store it in the freezer if you are going to use it less frequently. Any yeast you purchase should at least be refrigerated for long term storage.
If you have had it for more than 6 months or if it hasn’t been stored properly, test it for freshness before baking. I do this by adding 1/2 teaspoon of yeast to a cup of warm water (about 100 F) with a teaspoon of sugar. After about 10 minutes it should be actively foaming. If not then its time to get new yeast.
Unsalted Butter– These rolls have only been tested using real butter. I do not recommend margarine. It may work, but I have never tried it. To be safe, I would use the real stuff. European or grass-fed butter is my favorite.
Vanilla Extract & Paste– Adding a little bit of vanilla extract is one of the ways we set this apart from a regular white bread dough. When we combine a little extra sugar and a touch of vanilla, we get sweet dough that works for just about any dessert or breakfast roll.
For the icing, I go with a good vanilla bean paste. It’s a combination of extract and the inside of the bean. Vanilla paste packs a lot of flavor and I love the look of little flecks from inside the pods. It is not necessary and definitely not as commonly used as extract, but I am starting to see more recipes that use it. If it’s not something that you feel you need in your baking supplies, feel free to use plain extract in it’s place.
Powdered Sugar– This is for the icing. If you love extra icing, I suggest doubling the recipe. Looking for a “better for you” alternative? Check out my DIY Coconut Powdered Sugar!
Bread Machine– I have tested MANY recipes like this on several brands of machines. I would say that any 1.5 or 2 pound machine works to make this sweet dough. Because we are not baking in the machine it does not rise up to the lid.
TIP: If you are a bread machine newbie, I include a some extra tips & tricks below. I also highly suggest that you check out my Bread Machine Master Butter Dough recipe. In that blog, I go into a little more detail with some tips and tricks that I have learned along the way. Though using a machine isn’t exactly traditional, you can end up with a great result that fits into your busy schedule with a little practice.
Brown Sugar– You can use light or dark brown, it doesn’t affect the end result of the filling. Do not substitute any white sugar. Brown sugar has molasses, that is what gives it that color and flavor. Because of the molasses, you might find some harder lumps. I like to make sure I get out any hard pieces. You can do this by hand or with a spoon when mixing in the cinnamon.
Cinnamon– Cinnamon is classic but you can always get creative too. Use pumpkin spice mix or and unsweetened chai spice. See below for more ideas.
Small Silicone Spatula– This comes in handy during that first mix/knead of the dough cycle. Sometimes bits of flour or butter will get stuck to the sides and I carefully push that off with a silicone spatula so it incorporates. I use these for so many things in my kitchen.
Digital Scale– I prefer to weigh all of my ingredients in grams. Though this does not eliminate the need for occasional adjustments for a too wet or too dry dough, it does secure more consistent results. In the recipe card below, select Metric rather than US Customary if you are going to weigh in grams.
Dough Scraper– I use this to spread my butter onto the dough before the cinnamon filling. It is also a great tool to help remove anything stuck to your counters. Be careful using metal on delicate surfaces. Plastic dough scrapers also work great.
Digital Thermometer– I always check the internal temperature of my dough when the timer tells me that the rolls are done. I use a digital thermometer to check the middle roll for doneness. It should read 190 F – 200 F.
Baking Pans- You can use a 9 x 13″, 9 x 9″, or either an 8 or 9″ round. I recommend using aluminum rather than a dark non-stick pan. If you are using a darker pan or glass dish, set the temperature to 325 F.
Foil– You will definitely want to use foil during the final part of baking to keep the rolls from drying out and becoming too browned on top.

Rolling & Shaping
I try to roll them out into a 12 x 16″ rectangle, about ¼” thick. You can get 15 smaller rolls OR 7-9 thicker rolls. I usually use a 9 x 13” pan for 15 rolls and a 9 x 9” for the 9 thicker rolls. You can even make 7 in a 8-9″ round.
There is flexibility with cinnamon rolls. If you are feeding a crowd, cut 15. If its just a small amount that you need, then go for 7 or 9.
Use a serrated knife, lightly pre-mark your cuts. You will be making a starting mark in the middle and evenly again on each side to get the amount of rolls you wish. Once you have your marks, make your cuts.
Space them in a greased pan with room to rise and expand as they proof. They will also continue to “grow” a little larger when they bake.
After they are assembled and during the rising period, I prepare the icing and do my clean up. It is all very simple steps, one at a time. If this is your first-time making cinnamon rolls, you will be so impressed with yourself. I promise it will be something you want to make again and again!
Tips & Tricks
- Make sure all of your refrigerated ingredients are room temperature, unless you have a machine that pre-heats. I take them out of the fridge 1-2 hours ahead of time. If you are in a hurry, you can warm the milk in the microwave for 10-20 seconds at a time until it reaches 90-100 F. No hotter than 110 F or the yeast will not work. Another tip, the egg will come to room temperature much quicker if you remove it from the shell and place it in a bowl.
- Please read the user manual for your particular machine before you get started so you are familiar with the timing on the dough cycle and in which order to add ingredients. Every machine that I have used recommends adding wet, then dry so that is what I always do (I have tested this recipe in 5 different machines) and it never fails me, but I do recommend that you read the manual to be sure.
- Double check that the paddle is in the bread pan and remove the pan from the machine when you add the ingredients. If anything spills, it won’t end up inside the machine.
- I add the butter last in this recipe. The way it mixes with the flour gives me the fluffy results I am looking for in this type of dough. Cut it up and drop it in around the edge.
- I recommend supervising the first 5 minutes of the cycle. Look out for dough that may be too wet or too dry. Bread recipes are generally a guideline, temperature and humidity vary and minor adjustments might be needed. It’s easy to do, just have your ingredients handy. If it is too dry, add a small splash of milk as needed. Same if it is too wet, add a little flour. Give it a little time to combine before adding more. The dough should be “tacky” to the touch, no “pooling” underneath the paddle, will stick to the sides and release.
- If your dough is still a little on the sticky side when it finishes, don’t worry. The overnight fermentation generally takes care of that like magic. Use your best judgment here, if you still think it is too wet… as in not quite dough at all then just knead in a little flour before it goes into the fridge.
Variations
- Orange Cardamom Rolls– Add the zest of 1 orange to the dough after the first 10 minutes. Use 1 tablespoon of cinnamon and 1 teaspoon of ground cardamom with same amount of sugar in the filling. Take it up a notch and add Orange Extract instead of vanilla to the icing.
- Use Buttermilk or Evaporated Milk as your liquid. The buttermilk adds a little bit of sourdough flavor and evaporated milk is richer with notes of caramel.
- Use 1/2 the amount of Coconut Extract in place of vanilla extract in the sweet dough. Sprinkle flaked coconut on top of the iced rolls and you have Coconut Cinnamon Rolls.


Looking for some more breakfast ideas?
Buttermilk Pumpkin Spice Pancakes
Bakery Style Vanilla Bean Scones
If you try these Simple Overnight Cinnamon Rolls or any of my other recipes, comment & rate below.
You can also find me on Facebook & Pinterest!


Subscribe today for FREE weekly recipes sent directly to your inbox!

Simple Overnight Cinnamon Rolls
Equipment
- 1 Bread Machine 1.5 lb or 2 lb
Ingredients
- 1 cup whole milk , room temperature (up to 100 F)
- 1 large egg , room temperature, beaten
- 1 teaspoon vanilla extract
- 3 1/2 cups white bread flour
- 1/4 cup white granulated sugar
- 1 teaspoon plain salt
- 1 teaspoon instant yeast
- 1/4 cup unsalted butter , softened
Cinnamon Filling
- 1/4 cup unsalted butter , softened
- 1/2 cup brown sugar
- 1 1/2 tablespoons cinnamon
Vanilla Icing
- 1 1/2 cups powdered sugar, SEE NOTES BELOW
- 1/4 cup half and half
- 1/4 cup unsalted butter , melted, cooled
- 1 teaspoon vanilla paste or extract
- 1/4 teaspoon almond extract , optional
- 1 pinch plain salt
Instructions
Sweet Dough
- Remove the bread pan from the machine, make sure your mixing paddle is inserted. Add the ingredients in the order listed, from wet to dry unless your machine states otherwise in the user's manual.
- Set the pan back into the machine and start the dough cycle. Be prepared with your silicone spatula and additional liquid/flour if adjustments are needed. Set a timer for 3 minutes, then come back and help any ingredients stuck to the side incorporate into the dough ball. At about the 5 minute mark, make adjustments if the dough is too wet or too dry. (SEE TIPS & TRICKS ABOVE)
- Set a timer for the remainder of the time on the cycle so it does not over proof in the machine when it is done.Grease a large bowl and place the dough into the bowl and then lightly grease the top so it does not dry out. Cover the bowl tightly with plastic wrap and place in fridge overnight. It will continue to rise and the yeast will slowly ferment.
- In the morning, prepare your filling. Flour the surface you will be assembling the rolls on, and grease the pan. Take the bowl out of the fridge. "Punch" down the dough. Pressing into it with your fist and gently knock out the large pockets of air that built up overnight.
- Lightly flour your rolling pin and roll the dough into roughly a 12 x 16" rectangle at about 1/4" thick. Spread with the melted butter. (I like to leave about a 1/2" gap on top so when I roll it up I can pinch it closed)
- Spread the cinnamon mixture on top of the butter, again leaving that 1/2" gap on top. Roll it as tightly as you can while still being gentle enough to keep the shape, starting in from the bottom and rolling upwards to the top. Once you have rolled it up, pinch along the edge to close it up the best you can.
- Using a serrated knife, lightly pre-mark your cuts. You will be making a mark approximately every inch, 15 marks in total. Alternatively if you are making 7 larger rolls, make a mark in the middle and 3 more spaced out evenly to each side of your middle part.
- Cut carefully with the knife, placing them in the pan with enough gap to rise and expand. 15 should fit in a 9 x 13" pan and 7 should fit in a 9" round. Use whichever pan fits best for the amount of rolls you have, no need for perfection here. All we need are cinnamon rolls! You could even use a parchment lined sheet pan.
- Place in a draft free area and cover with a light kitchen towel to rise for 45 – 60 minutes. This may vary if your kitchen is overly cold or warm. I like to place mine in a "cold" oven with just the light on. That works for me every time. While these are rising, make the icing.
- When doubled in size, set the rolls aside and pre-heat your oven to 350 F. Place the rack in the middle and bake for 15 minutes, loosely covered with foil. Remove the foil and bake for for an additional 10-15 minutes. The rolls are done when they are lightly golden and the internal temperature reaches 190 F.
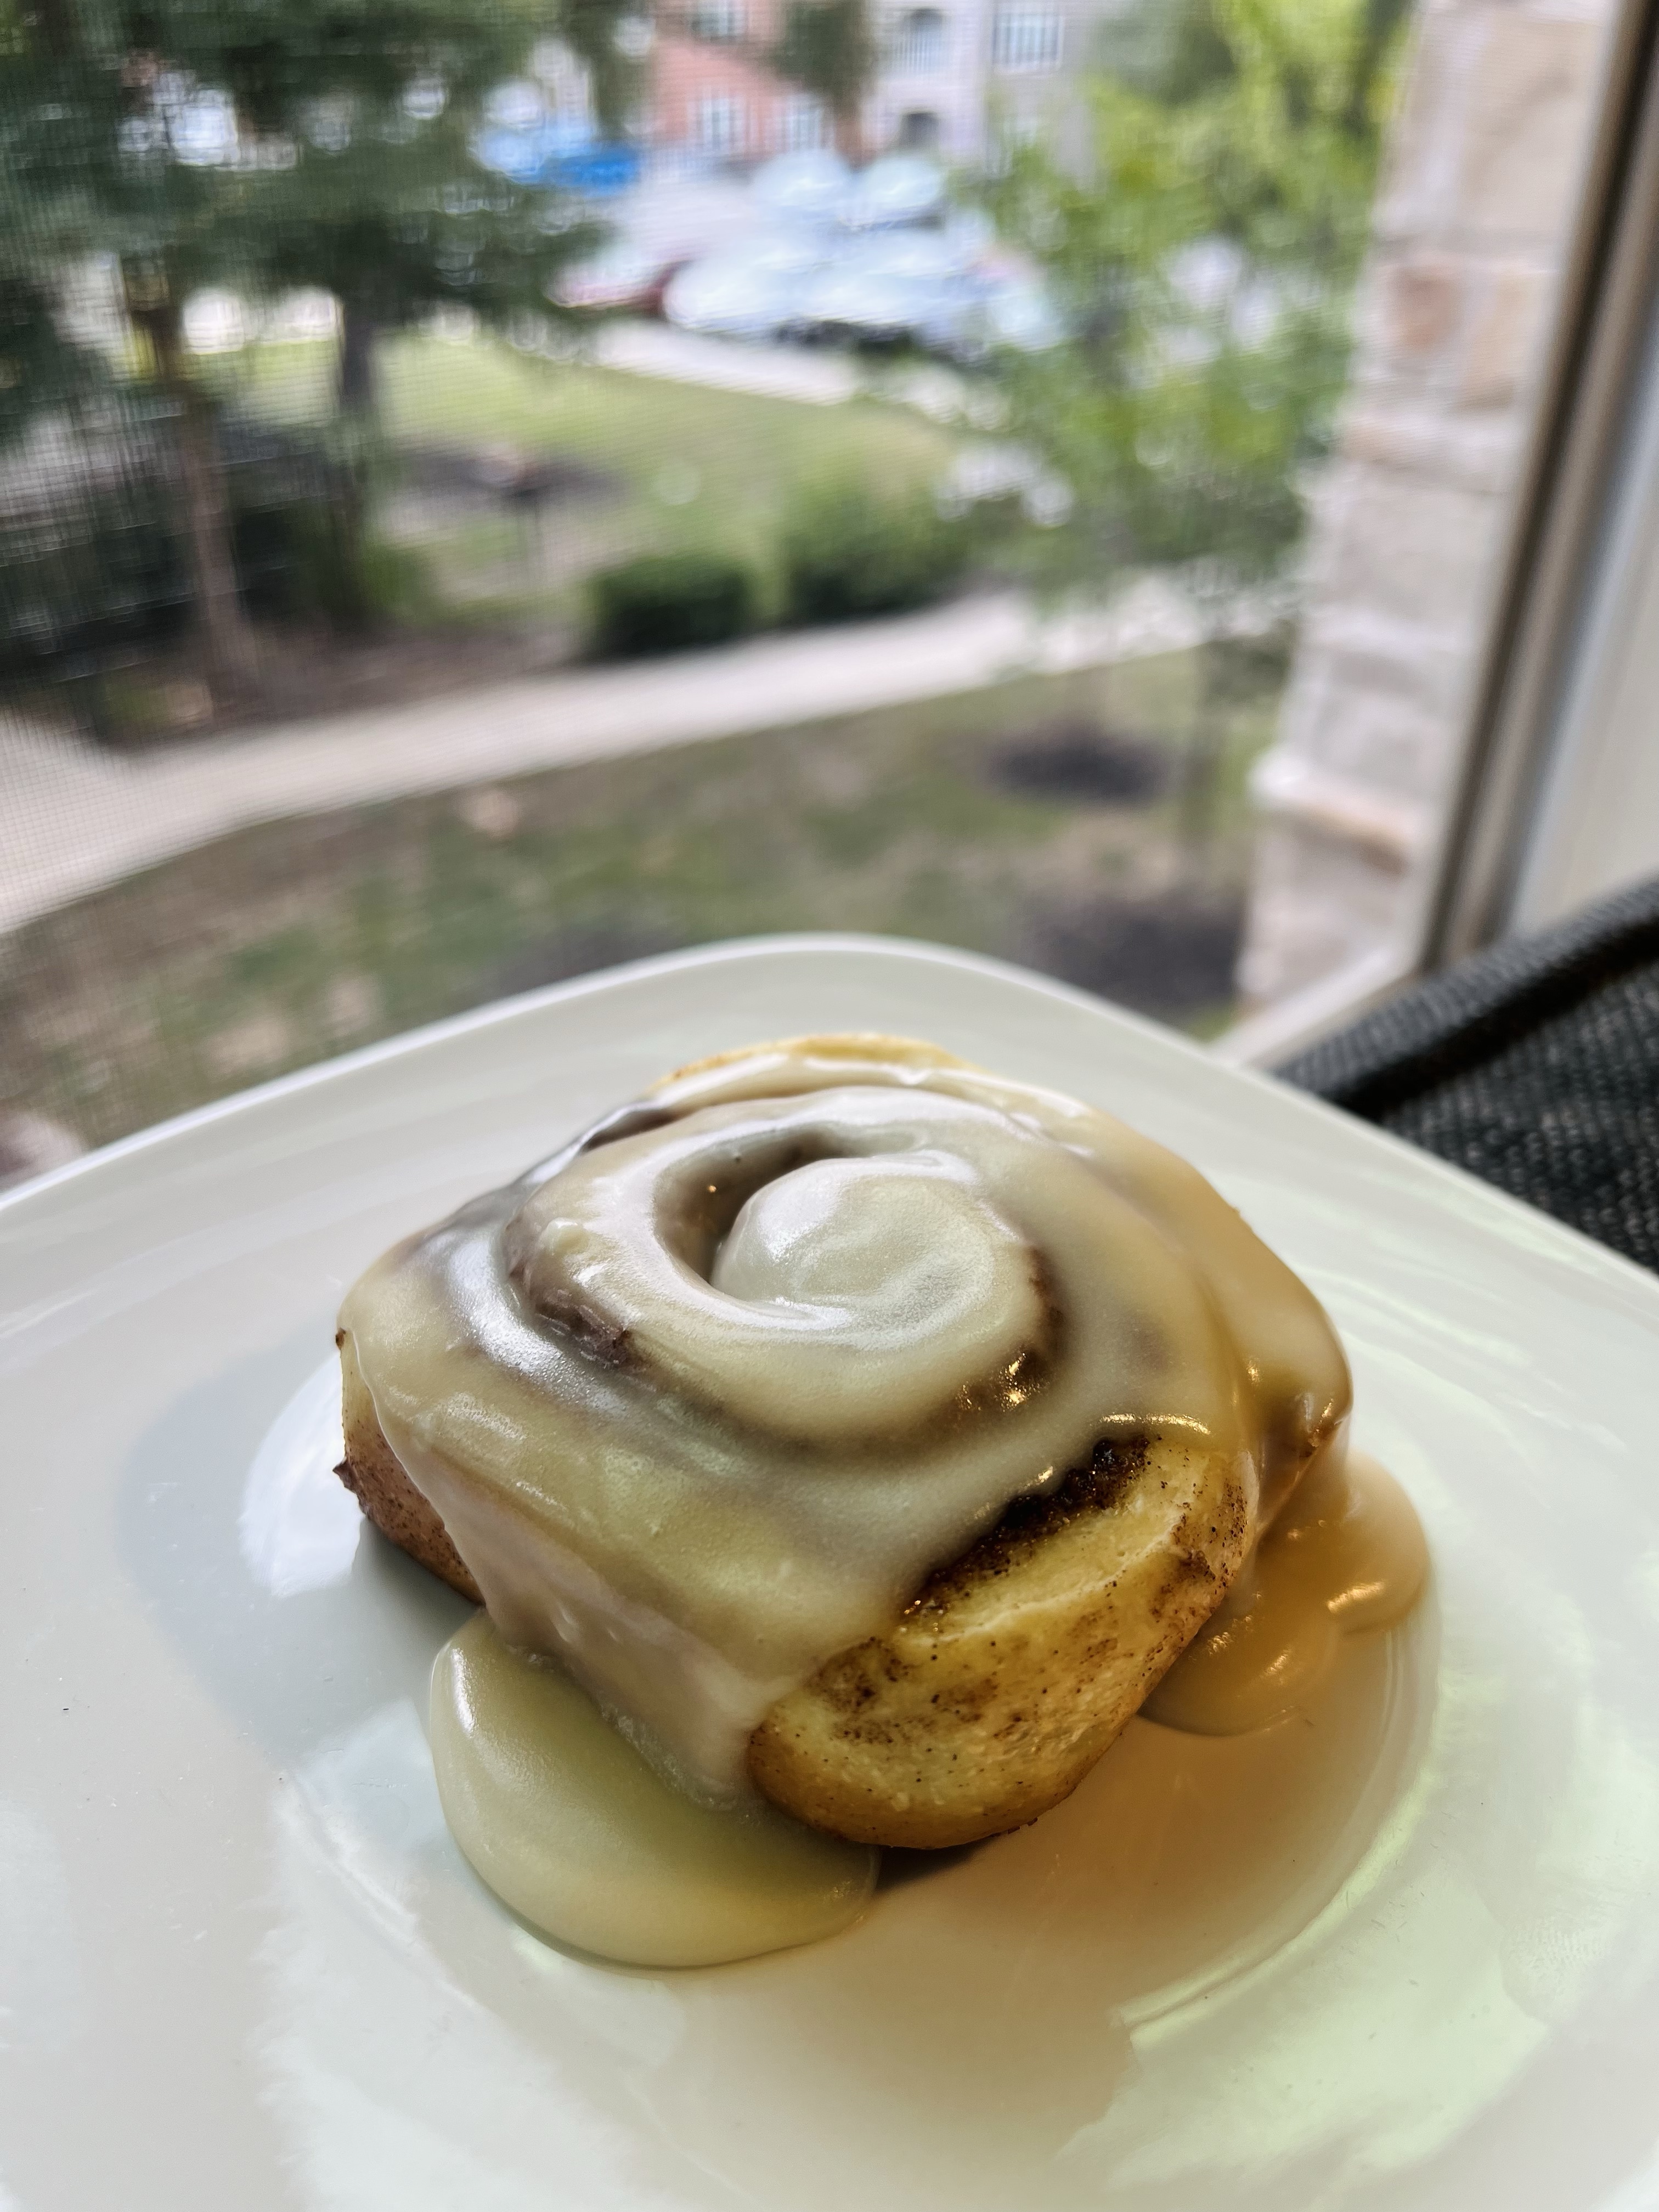
- I like to take a butter knife a loosely cut around the cinnamon rolls to loosen them from the pan and allow the icing to fall in between. Frost these while warm, serve and enjoy!
Cinnamon Filling
- Soften the butter and set aside in a separate dish. You will be spreading this in an even layer over the rolled out dough, leaving a 1/2" gap at the top for sealing the roll.
- Add the brown sugar and cinnamon to a small bowl. I like to remove any hard pieces and break the chunks apart to fluff it up a bit with a fork. This will be sprinkled over the butter just before rolling and cutting.
Vanilla Icing
- Place your melted butter, half & half, vanilla, and almond extract into a medium bowl or a glass 4 cup measuring jug. Sift in the powdered sugar and whisk well.You can also double this recipe. If you decide that you need more icing, it is quick and easy to whip up an extra batch. Just make sure you have plenty of the ingredients on hand.
Leave a Reply